Using Single Factor Auth Swift SDK
After successfully installing and initializing SingleFactorAuth, you can use it to authenticate your users and obtain their private and public keys.
Web3Auth SFA Swift SDK only works for users who have not enabled MFA. For MFA enabled users, you'll see an Error message.
The SingleFactorAuth instance natively provides the following methods:
| Method | Description |
|---|---|
| connect | Use to login user and retrieve private key pair. |
| logout | Use to logout existing user. |
| connected | Use to check whether the user is logged in or not. |
| getSessionData | This method helps to get the session data for valid session. |
| showWalletUI | Use to open templated the wallet UI in WebView. |
| request | Use to open templated transaction screens for signing transactions. |
Login User
Please refer to the Authentication section for more details on the setting up your verifier and other authentication parameters.
To obtain a user's private key using the Web3Auth SFA iOS SDK, you can call the connect method.
The method accepts LoginParams, and returns SessionData.
Please checkout the SessionData response for more details.
Parameters
- Table
- Type
| Parameter | Description |
|---|---|
verifier | The verifier parameter takes the name of the custom verifier from the Web3Auth Dashboard. This is a required field that must be a String. If you're using an aggregate verifier, make sure to pass the aggregate verifier name. |
verifierId | The verifierID takes the JWT verifier ID to be used for JWT/ID token verification. It can be an email, sub, or custom value available in the JWT token. |
idToken | The idToken accepts a JWT token obtained from the user's login provider. |
subVerifierInfoArray? | Sub verifier info. Usually used during aggregate verifier. It takes [TorusSubVerifierInfo] as a value. |
serverTimeOffset? | Specifies the server time offset in seconds. |
public class LoginParams {
    public let verifier: String
    public let verifierId: String
    public let idToken: String
    public let subVerifierInfoArray: [TorusSubVerifierInfo]?
    public let serverTimeOffset: Int?
    public let fallbackUserInfo: UserInfo?

    public init(verifier: String, verifierId: String, idToken: String, subVerifierInfoArray: [TorusSubVerifierInfo]? = nil, serverTimeOffset: Int? = nil, fallbackUserInfo: UserInfo? = nil) {
        self.verifier = verifier
        self.verifierId = verifierId
        self.idToken = idToken
        self.subVerifierInfoArray = subVerifierInfoArray
        self.serverTimeOffset = serverTimeOffset
        self.fallbackUserInfo = fallbackUserInfo
    }
}

public struct TorusSubVerifierInfo {
    public var verifier: String
    public var idToken: String

    public init(verifier: String, idToken: String) {
        self.verifier = verifier
        self.idToken = idToken
    }
}
Usage
let loginParams = LoginParams(verifier: "YOUR_VERIFIER_NAME", verifierId: "YOUR_VERIFIER_ID", idToken: "YOUR_ID_TOKEN")
do {
  let sfaKey = try await singleFactorAuth.connect(loginParams: loginParams)
} catch {
  // Handle error
}
Logout User
To logout the current user, you can use the logout method. Please note, the method will not logout
the user from the authentication provider, it'll only logout and invalidate the Web3Auth session.
Usage
do {
  try await singleFactorAuth.logout()
} catch {
  // Handle error
}
Check User's Logged In Status
You can use the connected method to check whether the user is logged in Web3Auth or not. Please
note, you should call this method after the initialize method if you want to check the user's
connection status for an existing session.
Usage
let isConnected = singleFactorAuth.connected()
Get Session Data
We have included Session Management in this SDK, so calling the getSessionData will retrive the
user's SessionData without re-logging in the user if a user has an active session. Otherwise, it
will return nil.
Please note, you should call this method after the initialize method.
Usage
let sessionData = singleFactorAuth.getSessionData()

if(sessionData != nil) {
  // User is logged in
} else {
  // User is not logged in
}
Response
The SessionData has the following four properties to retrive the relevant session information.
| Name | Description |
|---|---|
privateKey | Retrieves the user's private key. |
publicAddress | Retrieves the user's public address. |
userInfo | Retrieves the user's information like email, name, verifier id, and more. |
signatures | Retrieves the node's signatures that are returned for request. |
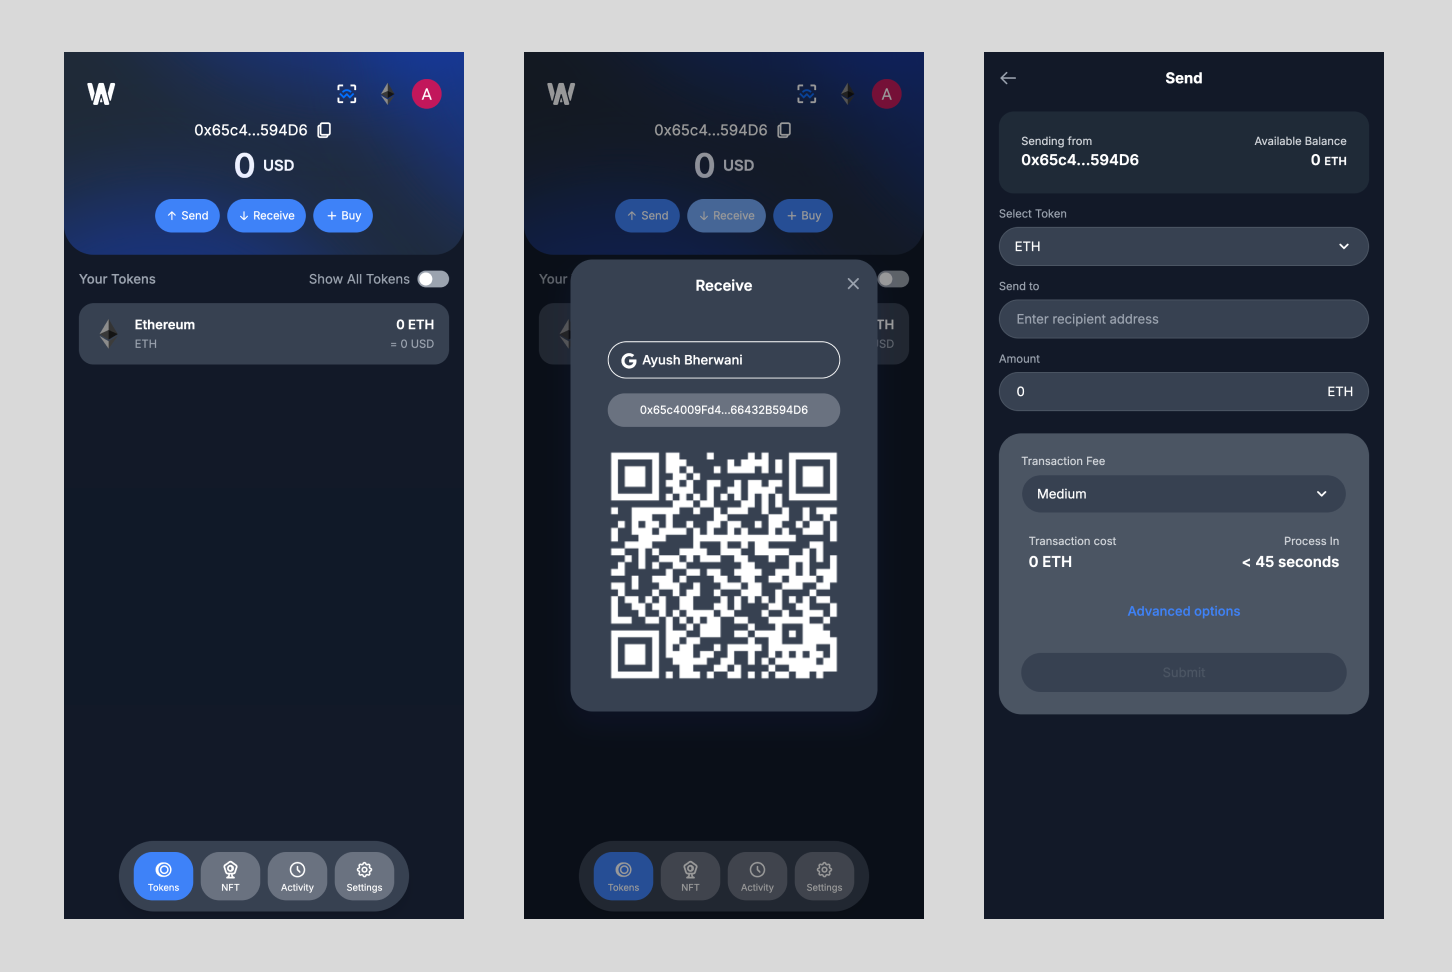
Show Wallet UI
The showWalletUI method launches a WebView which allows you to use the templated wallet UI
services. The method takes ChainConfig as the required input. Wallet Services is currently only
available for EVM chains.
Access to Wallet Services is gated. You can use this feature in sapphire_devnet for free. The
minimum pricing plan to use this feature in a production
environment is the Scale Plan.
Parameters
- Table
- Class
| Parameter | Description |
|---|---|
chainNamespace | Custom configuration for your preferred blockchain. As of now only EVM supported. Default value is ChainNamespace.eip155. |
decimals? | Number of decimals for the currency ticker. Default value is 18, and accepts Int as value. |
blockExplorerUrl? | Blockchain's explorer URL. (eg: https://etherscan.io) |
chainId | The chain id of the selected blockchain in hex string format. |
displayName? | Display Name for the chain. |
logo? | Logo for the selected chainNamespace & chainId. |
rpcTarget | RPC Target URL for the selected chainNamespace & chainId. |
ticker? | Default currency ticker of the network (e.g: ETH) |
tickerName? | Name for currency ticker (e.g: Ethereum) |
public enum ChainNamespace: String, Codable {
    case eip155
    case solana
}

public struct ChainConfig: Codable {
    public init(chainNamespace: ChainNamespace = ChainNamespace.eip155, decimals: Int? = 18, blockExplorerUrl: String? = nil, chainId: String, displayName: String? = nil, logo: String? = nil, rpcTarget: String, ticker: String? = nil, tickerName: String? = nil) {
        self.chainNamespace = chainNamespace
        self.decimals = decimals
        self.blockExplorerUrl = blockExplorerUrl
        self.chainId = chainId
        self.displayName = displayName
        self.logo = logo
        self.rpcTarget = rpcTarget
        self.ticker = ticker
        self.tickerName = tickerName
    }
}
Usage
do {
  try await web3Auth.showWalletUI(
    chainConfig: ChainConfig(
      chainId: "0xaa36a7",
      rpcTarget: "https://eth-sepolia.public.blastapi.io"
    )
   )
} catch {
  // Handle error
}
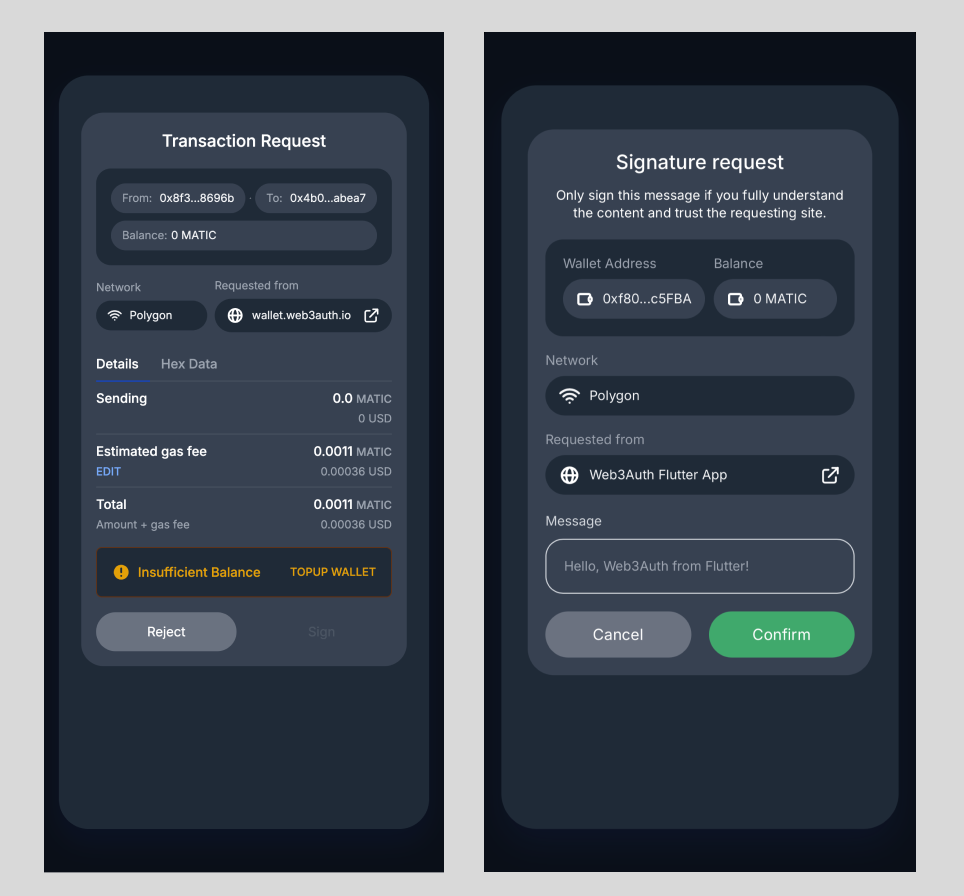
Request signature
The request method facilitates the use of templated transaction screens for signing transactions.
The method will return SignResponse. It can be used to sign transactions for any
EVM chain and screens can be whitelabeled to your branding.
Please check the list of JSON RPC methods, noting that the request method currently supports only the signing methods.
Please note, to use the request method, you need to configure the redirectUrl in the
Web3AuthOptions while initializing the SDK.
Parameters
| Parameter | Description |
|---|---|
chainConfig | Defines the chain to be used for signature. |
method | JSON RPC method name in String. Currently, the request method only supports the singing methods. |
requestParams | Parameters for the corresponding method. The parameters should be in the list and correct sequence. Take a look at RPC methods to know more. |
Usage
do {
  var params = [Any]()
  // Message to be signed
  params.append("Hello, Web3Auth from iOS!")
  // User's EOA address
  params.append(address)

  let response = try await web3Auth.request(
    chainConfig: ChainConfig(
      chainId: "0xaa36a7",
      rpcTarget: "https://eth-sepolia.public.blastapi.io"
    ),
    method: "personal_sign",
    requestParams: params
  )

  if response!.success {
     print(response!.result!)
   } else {
     // Handle Error
     print(response!.error!)
   }

} catch {
  print(error.localizedDescription)
  // Handle error
}
SignResponse
| Name | Description |
|---|---|
success | Determines whether the request was successful or not. |
result? | Holds the signature for the request when success is true. |
error? | Holds the error for the request when success is false. |